The performance of metrology fixtures can have a major impact on the efficiency and productivity of your quality control processes. In industries like medical device manufacturing, this reality is amplified by compliance and safety requirements, as well as the tight tolerances that often apply. Therefore, it’s essential to follow metrology fixture design best practices.
The Primary Objective of Metrology Fixture Design
In some respects, metrology fixtures have a straightforward function. They need to hold a part securely in place so inspection processes can be completed accurately. This simplified description applies to all methods of inspection, including CMM, flexible gaging, and vision machine inspection.
Of course, the reality in real-world production environments is not as straightforward as this simplified description sounds. Achieving repeatability and accuracy are the main challenges.
As a result, the objective of the metrology fixture design process is to optimize the positioning and securing of parts in the fixture while minimizing the need for operator intervention. This, in turn, mitigates operator variance as much as possible.
The Repeatability Priority
Consistency is essential in metrology, particularly in sectors like medical devices where inspection processes influence the performance of high-volume production lines.
To achieve consistency, metrology fixtures need to be designed to ensure maximum repeatability. Modern inspection machines provide technical solutions to the issue of repeatability by adjusting for small positioning and alignment errors. However, these technologies can only correct so much.
Larger problems with positioning the part will have a significantly negative impact on the inspection process, including rejecting parts unnecessarily.
If an operator has to work out how to position the part, the risk of error increases. Therefore, fixtures must be designed to make the positioning of parts intuitive and simple.
Automation solutions also enhance inspection repeatability. This includes both automating the process of putting the part on the fixture, as well as auto-rotating the part during inspection. Both levels of automation enable the inspection process to take place with minimal, if any, operator intervention, eliminating the risk of human error.
Reproducibility and Why It’s Important
Modular fixtures are often the most practical and cost-effective solution for your quality control requirements. However, with modular fixtures, the question of reproducibility becomes important in the fixture design process.
In other words, ensuring fixture components can be accurately and easily positioned on the base plate to measure different parts. Making the fixture setup process as accurate and easy as possible reduces downtime and removes operator variance, improving the efficiency of your inspection and quality control processes.
The most effective method of achieving this objective when designing metrology fixtures is to label holes for fixture components in an alphanumeric grid on the base plate.
The process for setting up the fixture for a specific part can then be documented in the quality standards documentation using the alphanumeric grid references, ensuring accurate reproducibility.
Maximum Measurements, Minimum Steps
Metrology fixture design engineers will aim to design fixtures to achieve the maximum number of measurements in the minimum number of steps. The ideal scenario is to enable all necessary measurements in a single setup.
Multi-Station Fixturing
Measuring a single part is not always the most efficient use of an inspection machine. This especially applies when measuring small parts such as those that are common in the medical device industry.
What you often end up with is a large inspection machine measuring a small part with lots of wasted inspection space. Addressing this issue to improve the efficiency of the overall inspection process is another consideration that is often important in the metrology fixture design process.
Multi-station fixtures are the solution. With multi-station fixtures, multiple parts can be added to the fixture where they can be inspected simultaneously, improving operator and inspection machine productivity.
Tried and Tested Metrology Fixture Design Process
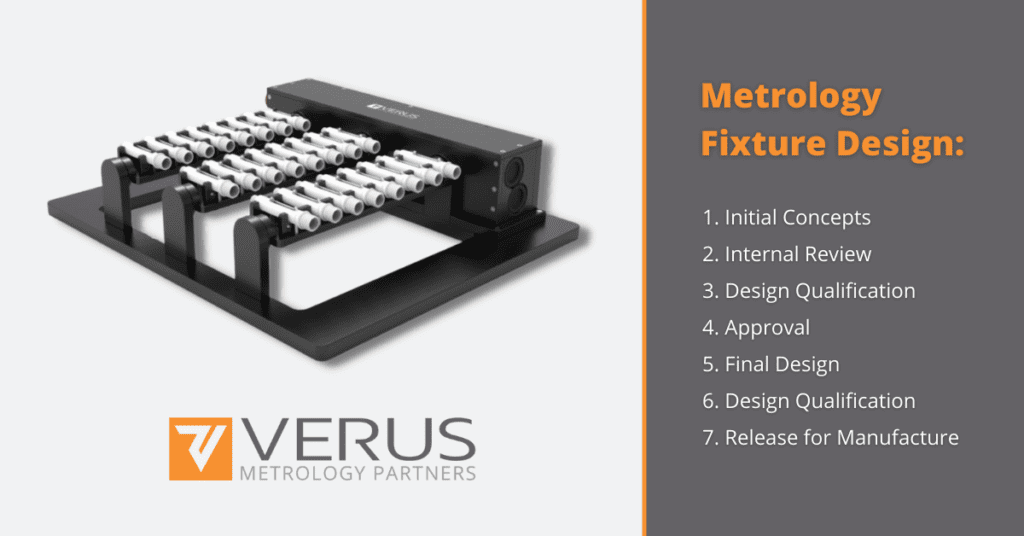
Metrology fixture design is a process that, when followed, optimizes timescales, maximizes the quality of the finalized fixture, and ensures maximum benefit for your quality control processes. At Verus Metrology, we use a robust design process that is tried and tested. It has seven main steps:
- Initial concept development
- Internal review with our metrology engineers to refine the concept
- Design qualification with the customer
- Approval stage 1
- Final design of the fixture including the creation of production drawings
- Second design qualification with the customer
- Release for manufacture
Finally, the Importance of an End-to-End Service
Offering an end-to-end metrology fixture service is also beneficial to the design process. An end-to-end service includes metrology fixture design, manufacturing, programming, and validation. After all, the design of a metrology fixture is only one part of getting to the stage where you can accurately and repeatably inspect manufactured components and parts in your lab.
At Verus Metrology, for example, our end-to-end service ensures maximum efficiency, quality, and returns on investment. It also ensures we maximize the benefits of the best practices that apply in metrology fixture design.


